
How to add custom fonts in Shopify in 4 simple steps
August 04, 2022Adding a Shopify custom font is one method to differentiate your store from the competition. It's a terrific way to grow your brand while also improving the appearance of your shop.
Picking the Best Font(s) for Your Brand
Make sure the font you chose matches what your brand stands for. The use of visually beautiful but difficult-to-read typefaces will detract from the content value. It's recommended to use readable fonts.
Use no more than 3 different fonts in your business. So many fonts could make your Shopify store appear crowded and unclear. Moreover, you should upload typefaces that work nicely with existing fonts, even if they're on separate pages. So don't choose fonts that are too dissimilar. Instead, select typefaces that compliment one another.
The Advantages of Using Custom Fonts
- Increase brand recognition in your business
- Enable your visitors to engage emotionally with the content: When visitors see a particular custom font, they frequently experience a specific mood. They are drawn to your shop simply because they are absorbed in the environment you have created.
- Make your shop stand out: use carefully chosen typefaces to give an aesthetic appeal to your shop.
How to add custom fonts in Shopify in 4 simple steps
How to add custom fonts in Shopify guide is provided below. No coding knowledge is needed. You guarantee success, make sure to follow the following steps properly.
Back up your current theme
Before adding custom fonts in Shopify, be sure to download the theme file so that you can simply roll back if any problems arise.
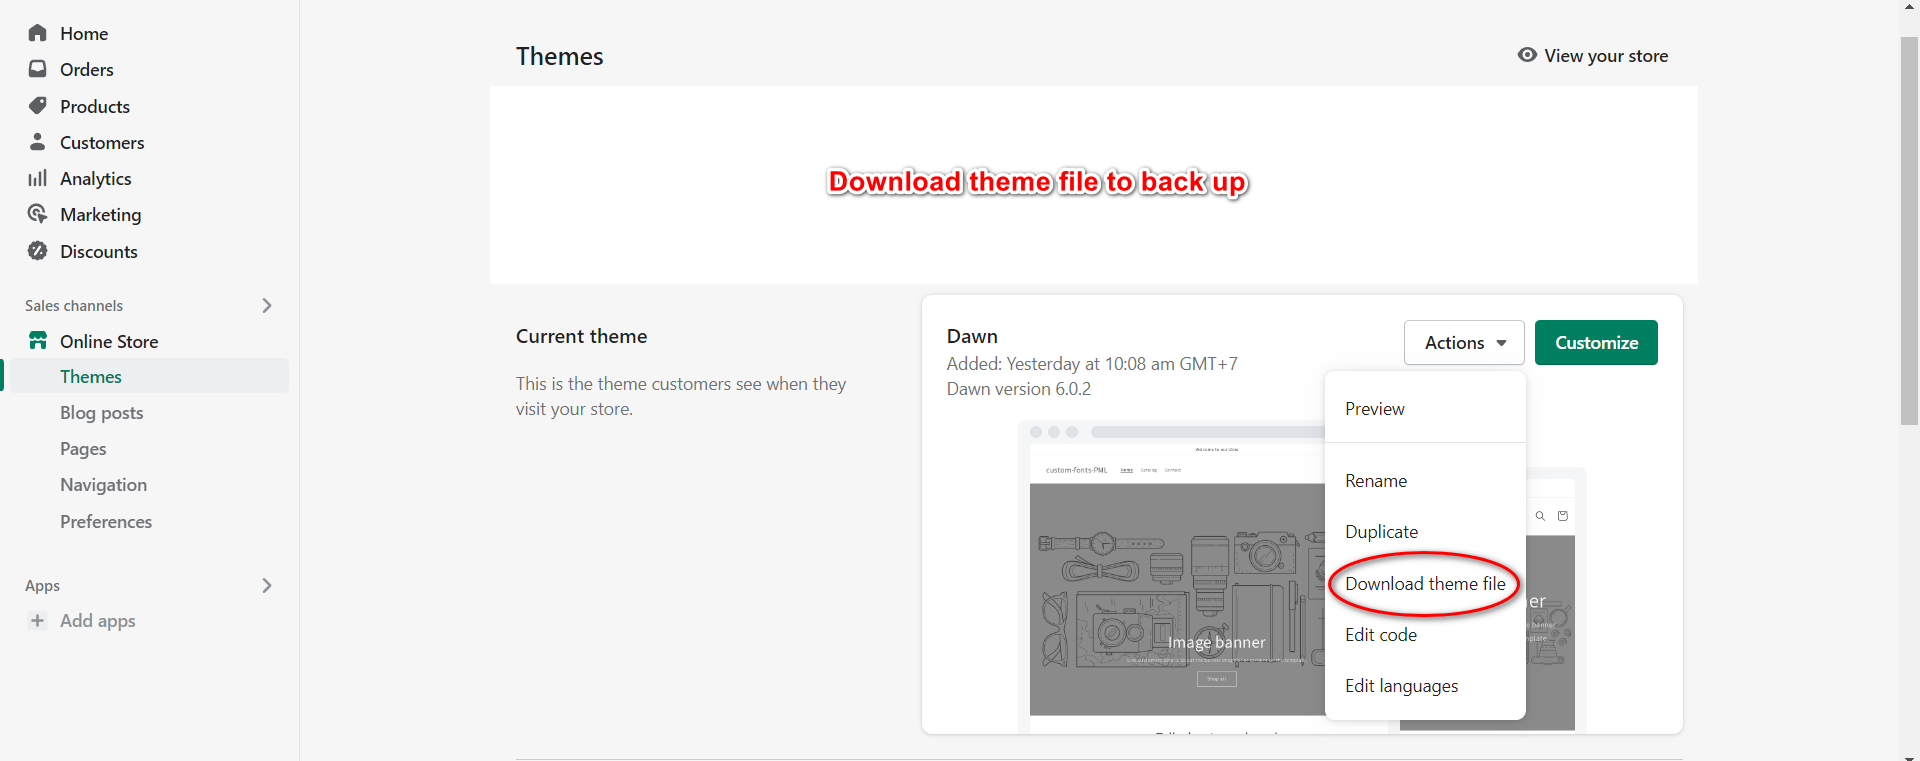
How to add custom fonts in Shopify
The very first step is to import the fonts into your shop. You can then use it in your theme by referencing it in code.
Go to Settings > Files in your Shopify Administration panel.
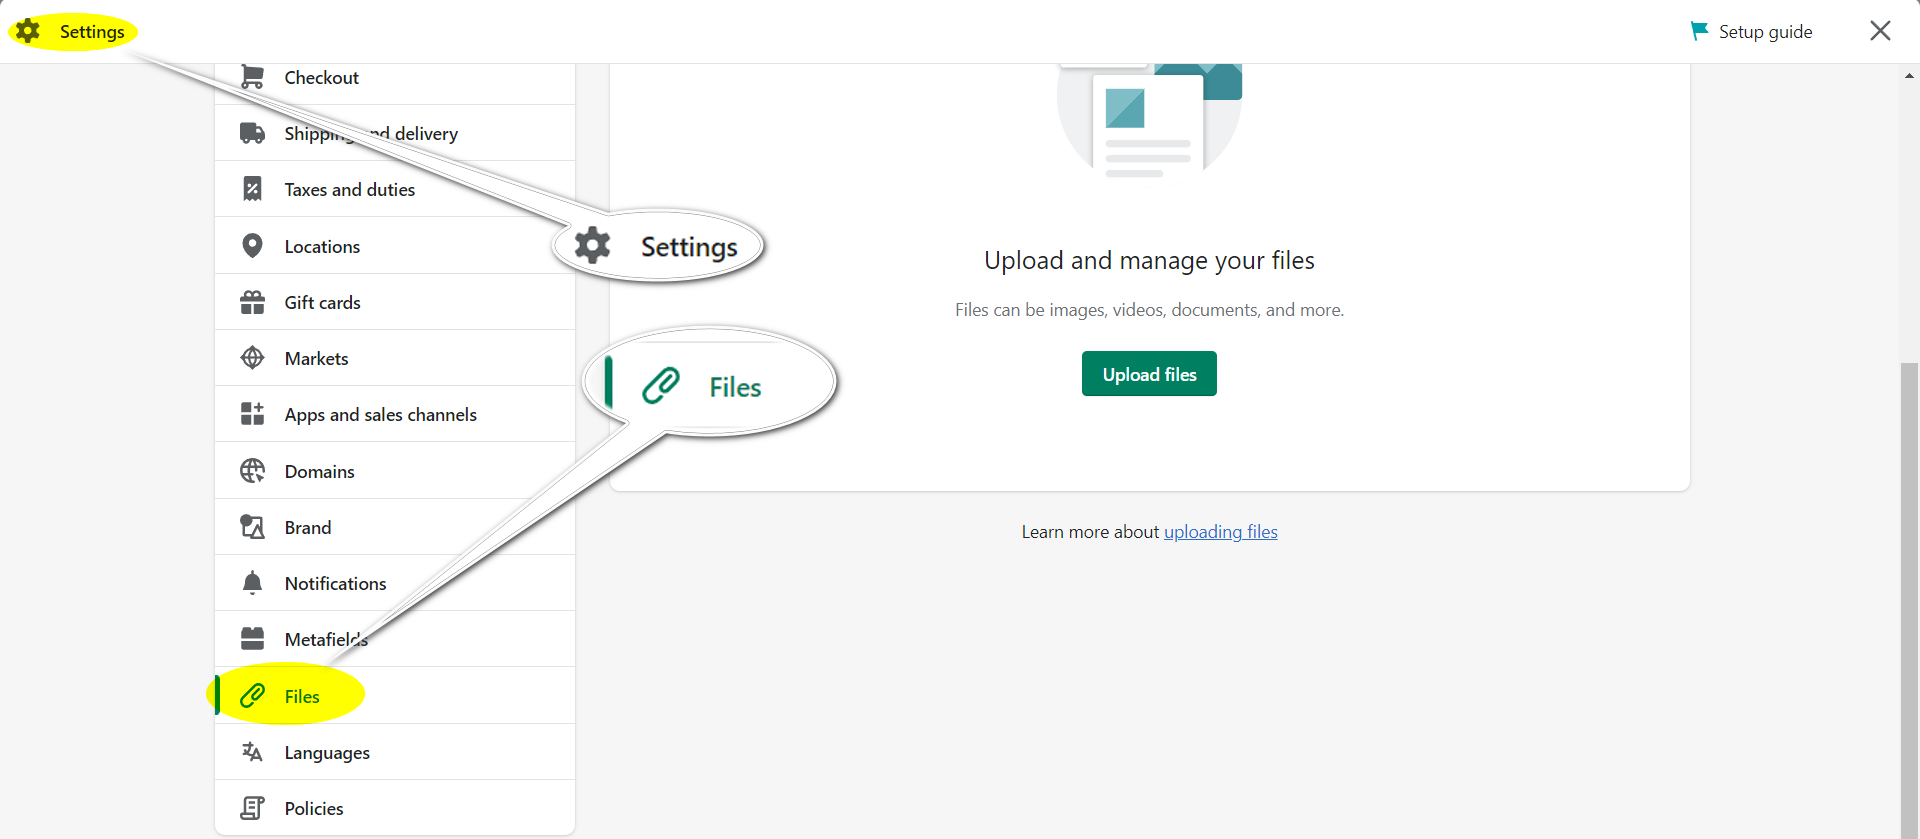
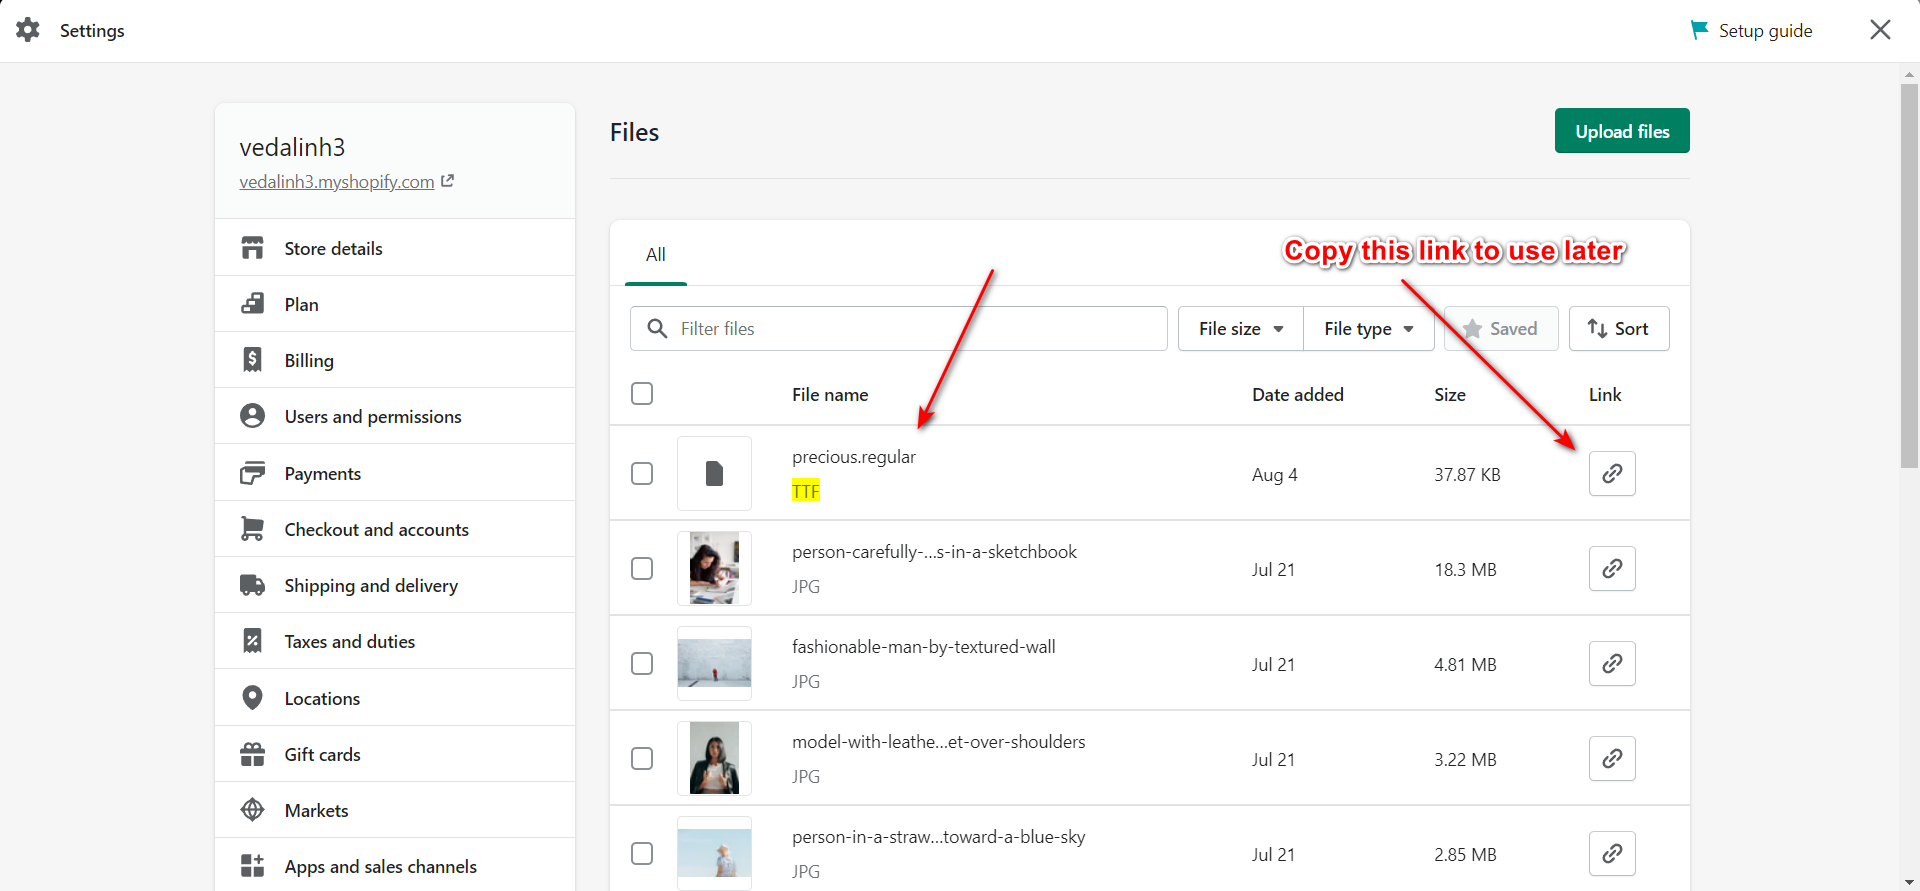
Upload all of your font files by clicking on upload files at the top right. Web font files are those with these extensions: woff, woff2, ttf, eot, svg, or rotf.
Different files are supported by different browsers.
– Chrome (all versions) → SVG/TTF/OTF
– Microsoft Edge → WOFF
– Firefox (3.5+) → TTF/OTF/WOFF
– Internet Explorer → EOT
– Opera (10+) → TTF/OTF
– Safari (3.2+) → TTF / OTF
As a result, make absolutely sure you upload all of the font files in a zip file. Or at least you should upload the correct one you want to add. In this situation, I just have 1 font file in.ttf format, thus I'll simply submit that. (If you wish to follow along, you may get this font here.)
Once you've submitted your font files, you can link them to the theme.
Set up the font
Go to Online Store -> Themes -> Actions -> Edit Code.
Click "Add a new snippet" under snippets and name your sample custom-fonts.

This is the code example we'll use.
<style>
  @font-face {
  font-family: "fontname";
  src: url('fonturl-eot') format("embedded-opentype"),
       url('fonturl-woff') format("woff"),
       url('fonturl-woff2') format("woff2"),
       url('fonturl-ttf') format("truetype"),
       url('fonturl-svg') format("svg");
   }
h1,h2,h3,h4,h5,h6,html,body,*,[id] *{
  font-family: "fontname" !important;
}
 </style>
Note: The code above should be changed corresponding to your chosen font.
- "fontname" = the full name of the font you've added.
- "fonturl-" = a link to the font file. So, if your font file has.woff and.woff2 extensions, change them in the code above.
In our situation, it would be as follows:
<style>
      @font-face {
      font-family: "Precious";
  src: url('https://cdn.shopify.com/s/files/1/0619/6386/2179/files/precious.regular.ttf?v=1659583813') format("truetype");
   }
h1,h2,h3,h4,h5,h6,html,body,*,[id] *{
  font-family: "Precious" !important;
}
  </style>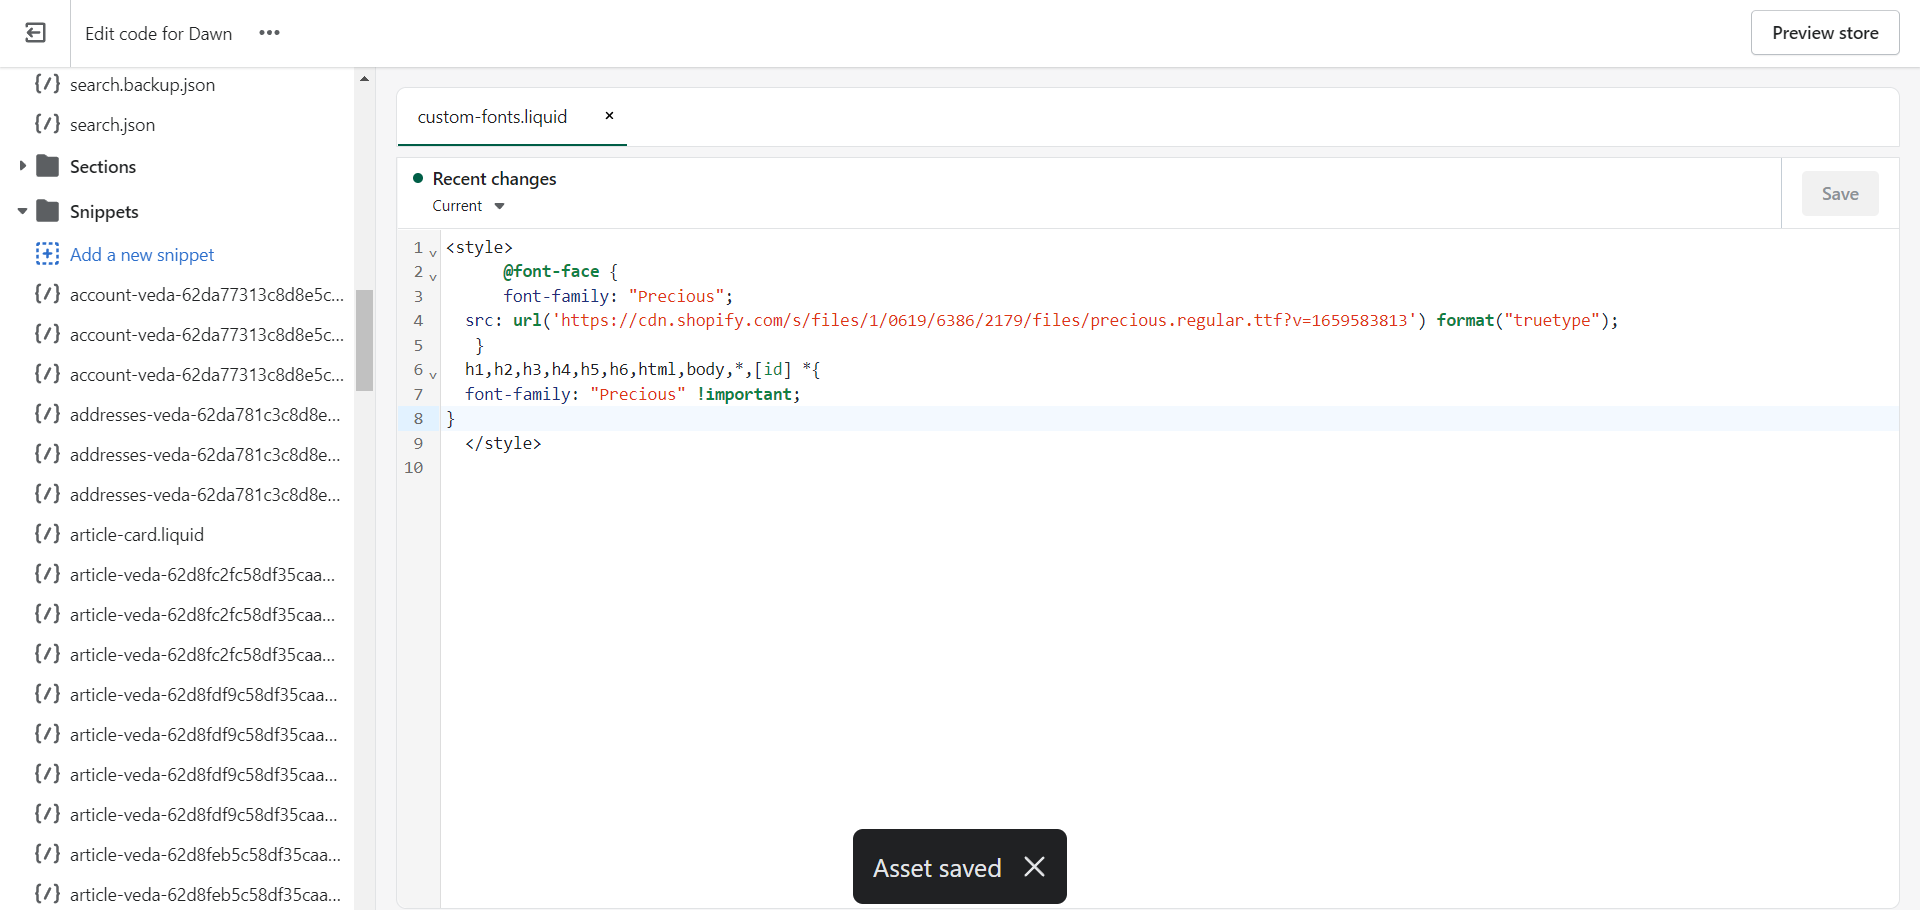
I removed the other lines of code as I have only the .tff file. Remember to end the last URL line with a semicolon.
Load the custom font
Go to the theme. liquid file
Locate the < /body>
Insert the following code: {% include 'custom-fonts' %}
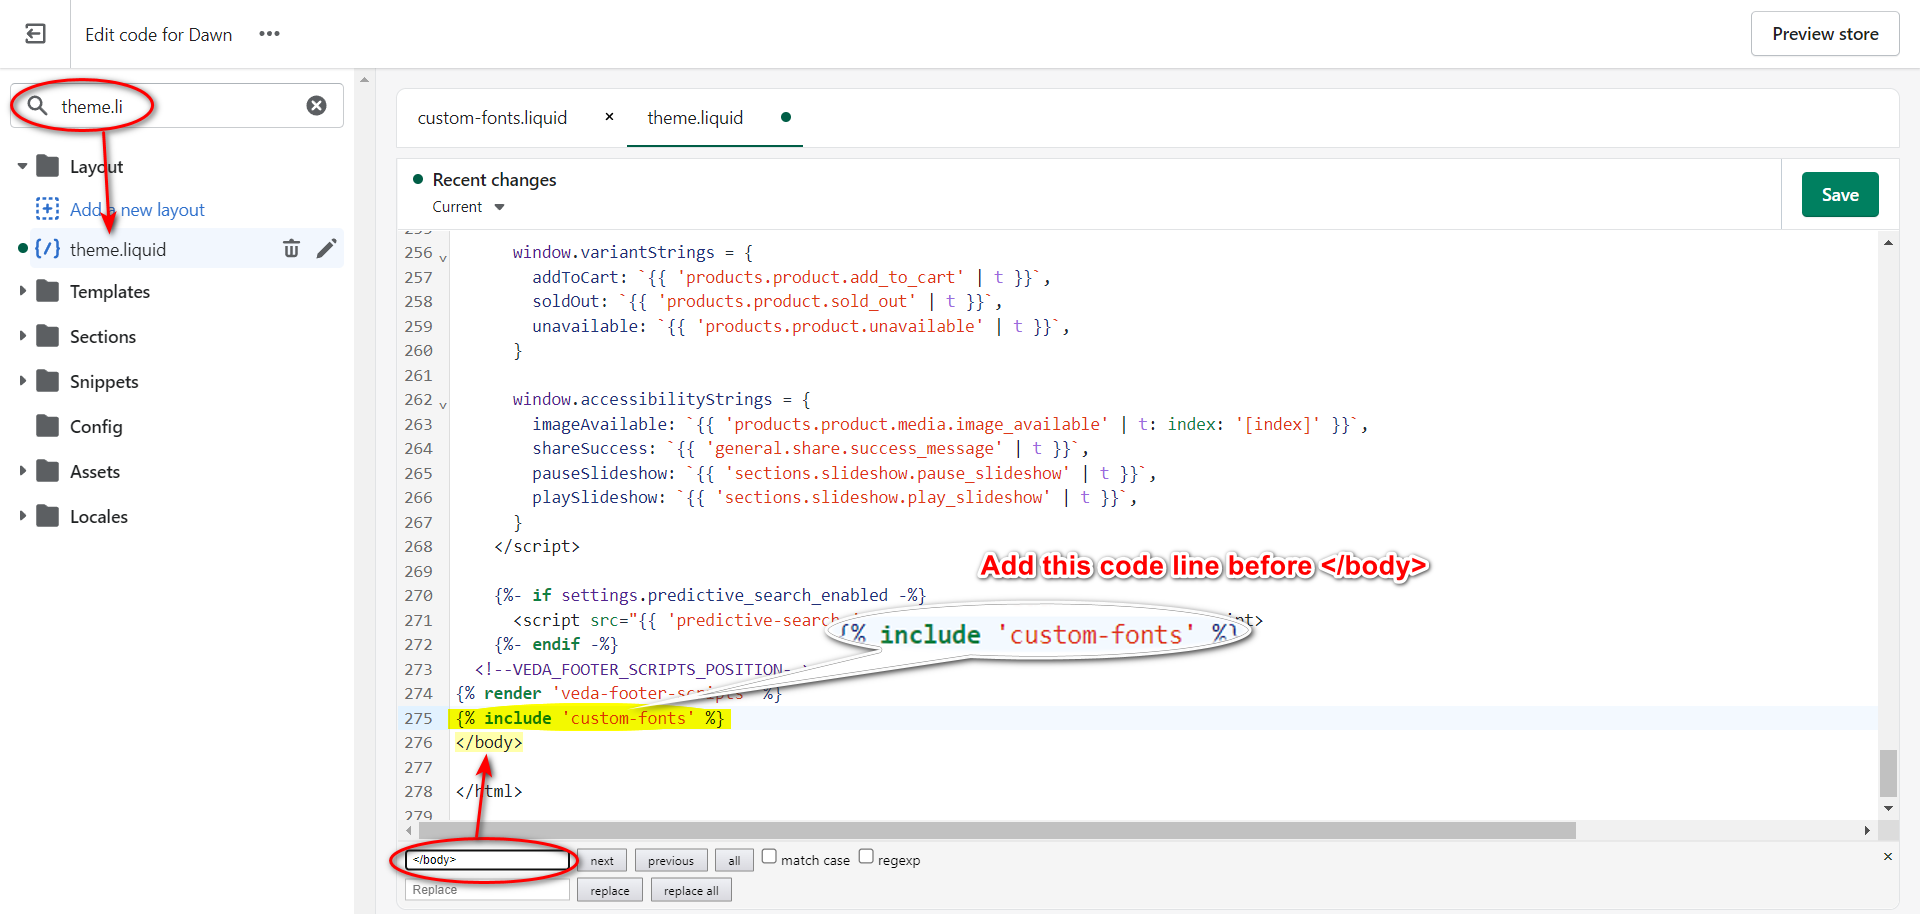
And you're all set!

How to add custom fonts in Shopify: Conclusion
I’m sure that you knew how to add custom fonts in Shopify. You might also like the following tutorials: