


Easy Guide on Adding Google Tag Manager to Shopify
June 25, 2022Easy Guide on Adding Google Tag Manager to Shopify. Google Tag Manager (GTM) is a wonderful tool that help you add as well as manage tracking codes in one place.
Why you should add Google Tag Manager to Shopify?
Google knows how time-consuming and laborious it was to add and monitor tags from various marketing platforms. For one of your Shopify stores, you need to add the most frequently used tracking tags such as Google Analytics, Facebook Pixel, Google Ads Conversion Tags, Hotjar, and others.
Many firms have several brands, websites for each of those brands, and potentially mobile applications in addition to their single webpage. That's a lot of effort, wow!
Therefore, it was revolutionary when Google introduced Google Tag Manager (GTM). This is a tool that enables marketers to include marketing and monitoring tags into internet domains without having any programming skills. You can get up and running in a matter of minutes by simply adding the code for GTM to your Shopify store.
Consider Google Tag Manager to be a toolbox where you maintain all of your tools, including Google Analytics, Google Ads, and so forth. It acts as a sort of mediator between your monitoring tools, taking on a significant amount of work without, of course, trying to replace your developer. It is a really useful tool, especially for marketers, because it enables you to control everything from within the Google Tag Manager interface.
Tracking codes are referred to as "tags" in Google Tag Manager. Additionally, the GTM's user interface serves as a useful hub for managing such tags. New tags may be added quickly and easily without any coding knowledge.
How to add Google Tag Manager to Shopify
First, you should log into your GTM account to receive the code. After that, select "Admin" from the top navigation, and then select "Install Google Tag Manager". Two sections of code like below will be shown.
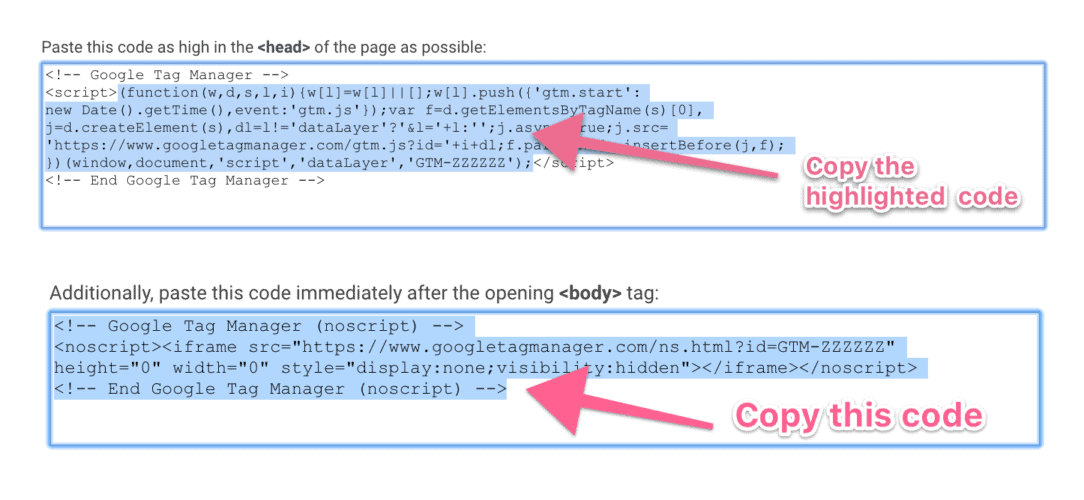
For the first section, take anything between the "script" tags (excluding the actual tags). For the other one underneath, you should copy the entire section.
Steps to add the code of Google Tag Manager to Shopify store:
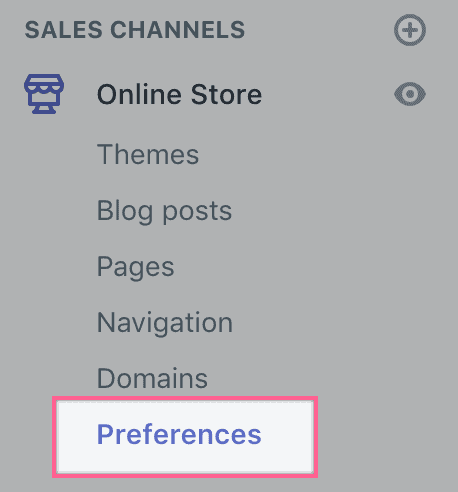
- From your Shopify admin dashboard, click “Online Store” and choose “Preferences” settings
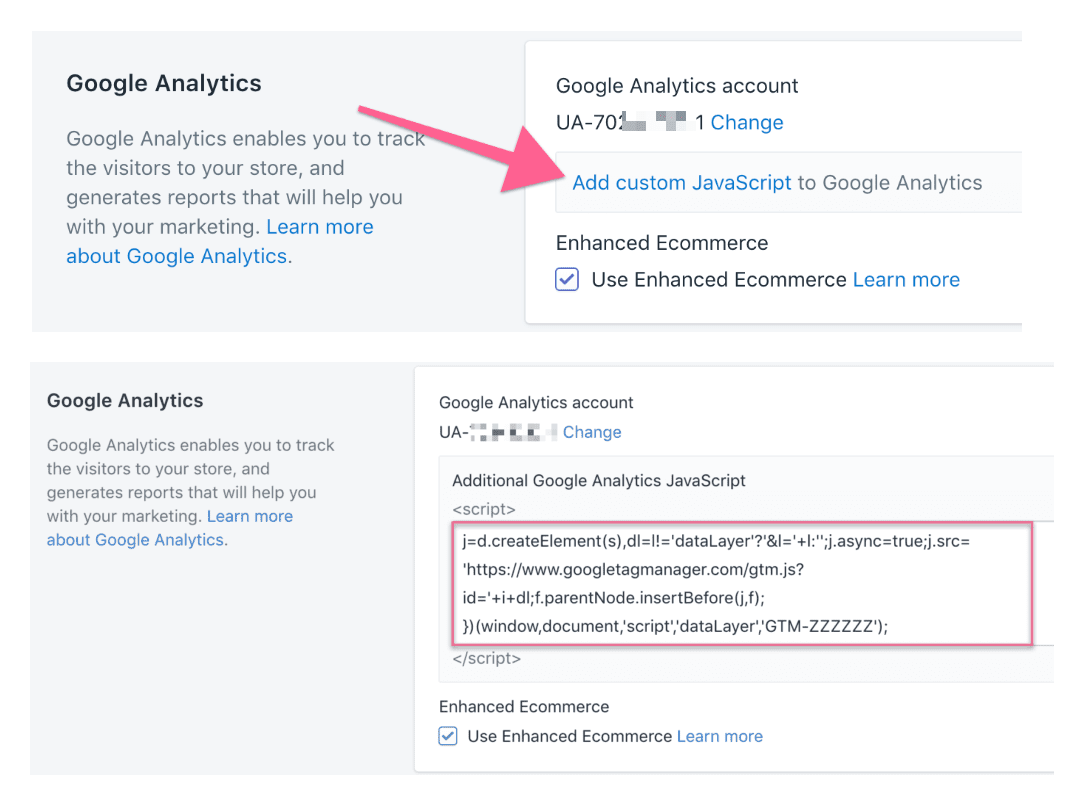
- Scroll down to the Google Analytics area and hit “Add custom JavaScript”
- Copy & paste the first section of the code
- Click “Save”
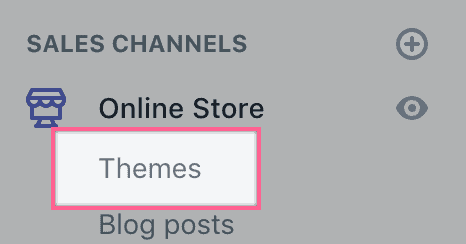
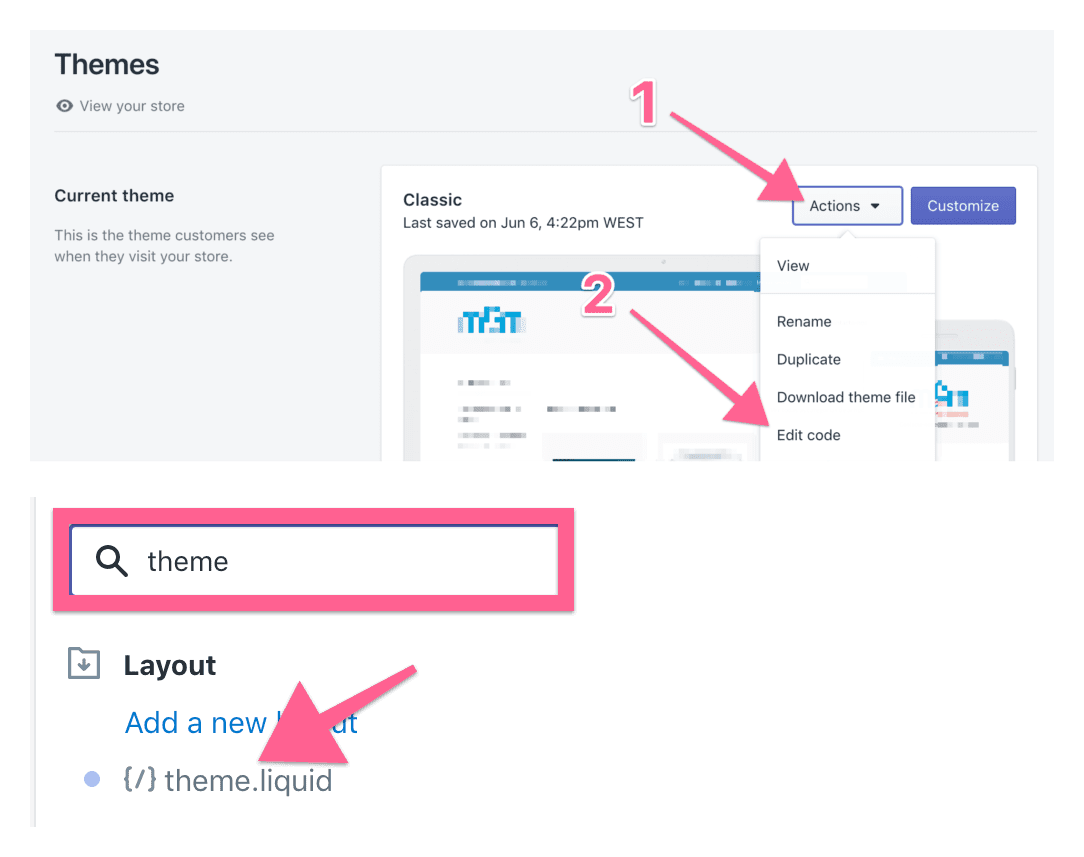
- After that, choose “Themes” settings
- Select “Action” and “Edit code”
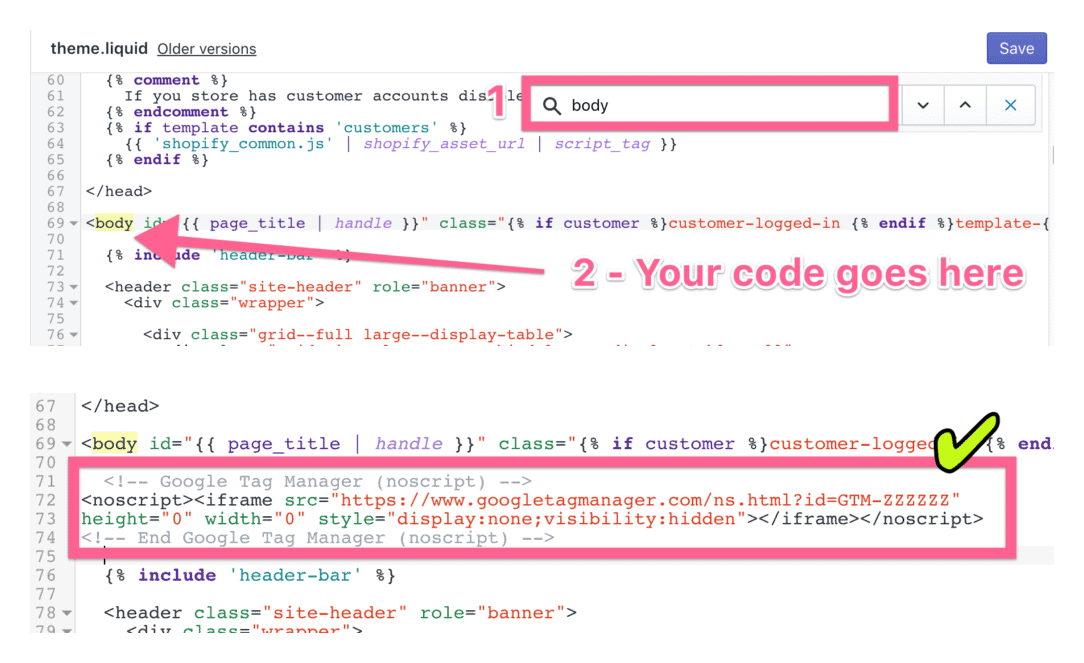
- Find the “theme.liquid file” folder
- Paste the second piece of code immediately after the opening tag
- Click “Save” in the top right corner
Test if adding Google Tag Manager to Shopify successfully
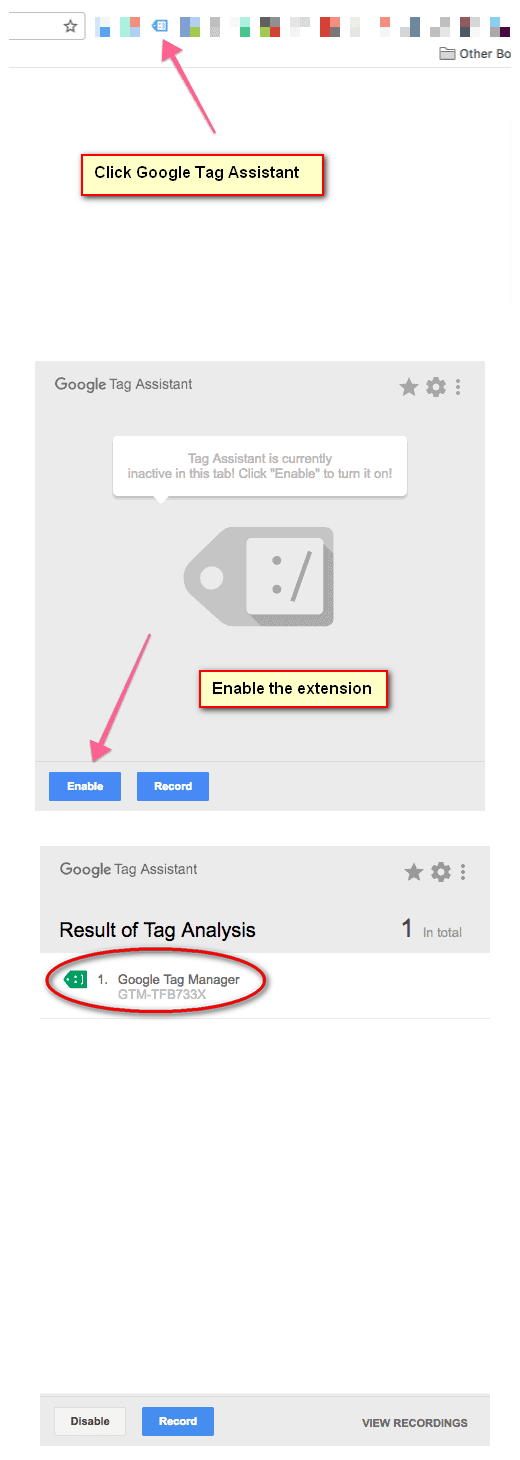
Let's check that everything is functioning properly before we conclude. One useful tool you can download to test is the Google Tag Assistant Extension.
- Install it on Google Chrome
- Open your website and select the Google Tag Assistant icon
- Click “Enable”
- Click the Google Tag Assistant once again after refreshing the page
- If the setup was successful, you will see a green tag for GTM
Add Google Tag Manager to Shopify: Final words
If you completed all the procedures up to this point, Shopify Google Tag Manager should now be deployed in your store. Plus, the container should now appear on all of your pages, including checkout ones.